
Quick disclaimer before we start. This is well-trod ground. Nothing here is new or revolutionary, nothing about this implementation hasn’t already been done by smarter folks than I :) This is just my blog post about it.
We’ll use webmention.io for this. webmention.io is a hosted service for receiving Webmentions. There are many other implementations of the Webmention spec, but this is the easiest one to get cooking with in my experience! All we have to do to get started is to authenticate ourselves using IndieAuth, and then connect our webmention.io endpoint.
Authenticating with IndieAuth via IndieAuth.com
One thing I’ll say is that while “the hardest part of computer science is naming things” is contentious, "the hardest part of “interfacing with IndieWeb tools is the names of things” is inarguable: IndieAuth.com is a hosted implementation of the IndieAuth specification, and it’s what webmention.io, which is a hosted implementation of the Webmention specification, uses to handle authentication.
It’s devious work, I agree, but thankfully your old friend Mr. Websites has already handled the mess of this naming convention.
Identity Verification
One of the major tenets of the IndieWeb is this concept that your personal domain, which you own, can be used to verify your identity across the web. A common mechanism for this identity verification is the use of rel="me" links.
The way rel="me" works is:
-
On your website, you can add a link to another online profile or source of identity, such as GitHub, your email inbox, or Mastodon (for this tutorial we’ll use GitHub, as that’s one of the acceptable providers for IndieAuth), and add an attribute
rel="me", which “indicates that the current resource is represented by the linked party.” More on the rel=“me” configuration can be found on MDN. Here’s how it might look for me:<a href="https://github.com/xdesro/" rel="me">GitHub</a> <!-- Bluesky & Mastodon links are good use cases for a rel="me" link, but for IndieAuth to work in this demo, we'll need to use GitHub. You could also use your email or a PGP key! --> <a href="https://bsky.app/profile/strange.website" rel="me">Bluesky</a> <a href="https://front-end.social/@henry" rel="me">Mastodon</a>If you prefer not to have visible links, you can use
<link>tags in your document<head>:<link rel="me" href="https://github.com/xdesro" /> -
On each linked profile, link back to your website. On GitHub, for example, if you link to your URL, they’ll automatically add the
rel="me"attribute when rendering: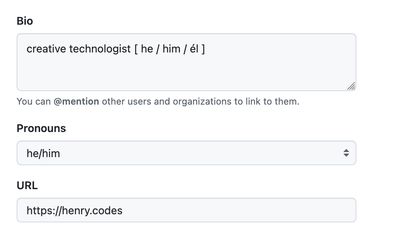

That’s all you need to do for IndieAuth. The basic idea here is that only You can update your website to add a statement like “this link is my GitHub account”, and furthermore only You can update your GitHub account to say “this link is my personal website”, so it stands to reason that because they refer to each other, they’re both You.


We can move on to the next step now, but if you’d like to, you can test your IndieAuth configuration here.
Actually collecting Webmentions using Webmention.io
Now that we’ve set up IndieAuth, we can log in to Webmention.io. It’ll prompt us to log in via whatever modes we’ve configured, and then we’ll verify our login. Next, add the <link rel="webmention"> tag that it gives you to the <head> of your HTML document.
That should be all we need to start collecting Webmentions to our site! The Webmention.io dashboard will show recent Webmentions, or I usually use the actual API view, which you can access from the Webmention.io settings page, because it’s a bit cleaner.
If you want to test that everything’s hooked up, I’ve found the beatonma.org Webmention testing tool works great; just paste in a URL on your site and refresh the Webmention.io dashboard to see it show up!
Next steps for Webmentions
If you’d like, you can also request the mentions.jf2 endpoint from the Webmention.io API:
https://webmention.io/api/mentions.jf2?token=${the token on the webmention.io settings page}
This will give you a JSON readout you could use to render mentions on your site, but that’s another blog post — in fact I’d like to do a whole series on it but IMO this is a great start for getting involved with the IndieWeb and using your domain as an identity store. Fantastic work, your ancestors (the chill ones) are smiling upon thee on this day.
Further Reading
Here’s to all the killers that have covered this subject matter before, and some other really good resources for this sort of work.
- An In-Depth Tutorial of Webmentions + Eleventy, by Sia Karamalegos
- Adding Webmentions to Your Site, by Robb Knight
- Using Webmentions in Eleventy, by Max Böck
- Adding webmentions to your static blog, by Jan Monschke
- The W3C Webmention spec
- The IndieAuth spec