Quick heads up: Since writing this, I’ve found one or two fairly sizeable bugs in the Galleria plugin. I’ve published anyway cause the guide is not entirely dependent on Galleria, and Galleria is mostly functional. You can still give it a shot, or alternately use Photoshop’s Perspective Warp tool, or come back soon and I should have it worked out :) (cir. Feb 21 2025)
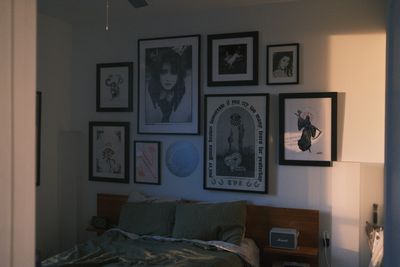
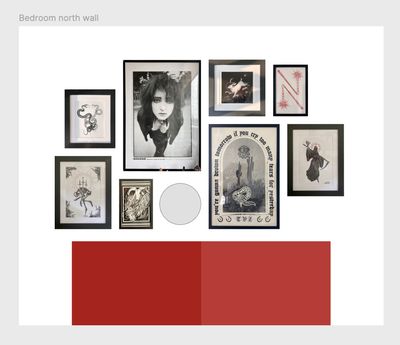
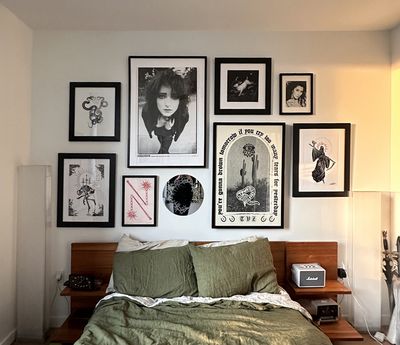
I’m a twisted animal with a penchant for moving every two years, and the universal upside of moving every two years, as everyone will agree, is hanging new gallery walls. The rectangle enjoyer in me started using Figma to design them a few years ago; the upside is I can draft a bunch of ideas without taking up room on the living room floor, and can re-use the assets created year after year on new walls at new apartments. It even has the added bonus of becoming a little archive of past walls. It’s nice, and you can too.
The tools you’ll need for this are:
- A tape measure
- Phone or other camera
- Figma
Bro I realized about 4 seconds into writing this that IRL frames and Figma frames are really hard to refer to distinctly in writing — if any of this is confusing shoot me an email or complain on Bluesky and I’ll get you sorted.
Gathering and treating assets
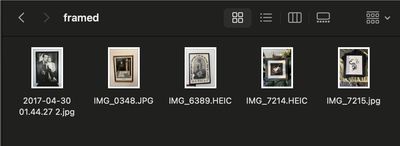
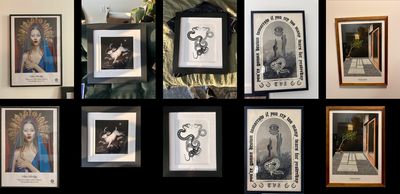
The first thing that needs done is to photograph the pieces that’ll be going into the wall. I try to always shoot new additions in the same context and light. You want to avoid glare but most everything else can be fixed with a Figma plugin we’re gonna grab in the next step. It doesn’t even particularly matter how far or at what angle you take the photo, but in general:
- Take a photo of the entire framed image. The frame is part of the visual effect of the gallery wall so it’s important to include it, not just the artwork it contains.
- Leave a few inches around each frame, both to avoid lens distortion and so you have some room to crop in.
- Try to shoot mostly straight on. Doesn’t need to be perfect by any means but a little effort to square things up a bit before we manually square them wouldn’t be a bad thing.
Correcting perspective using the Galleria plugin
Next we’ll use a Figma plugin I made (crowd slamming hands on tables, chanting “shill! shill! shill!”) to make sure the perspective of our images is perfectly square for planning and mockup purposes. You can install and run the plugin from Figma Community:
Galleria - Perspective Warp Tool
A Figma plugin for correcting or warping the perspective of image fills in your Figma document.
I’ve already written a detailed guide on how to use the plugin elsewhere on my blog, so if the onboard UI isn’t clear, you can head over there to get situated!
Correcting perspective in Figma images with the Galleria plugin
Read moreI based the functionality of this plugin off Photoshop’s Perspective Warp tool, so if you’ve got Photoshop and don’t wanna touch my garbage that’s a super strong alternative.
I try to stick to an assembly-line style of work, taking all of the photos at once, adding them all to Figma at once, correcting all their perspectives in a batch, etc. For each framed image, we’ll import it to Figma and use Galleria correct the perspective. Then we’ll crop the output to only the framed image, and paste it into the Figma canvas.
Mapping IRL measurements into Figma
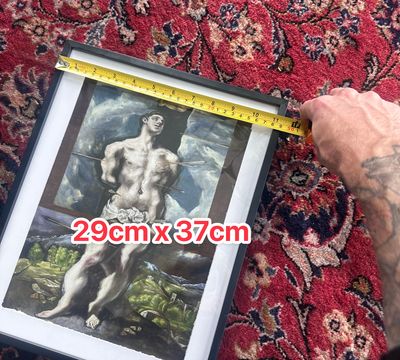
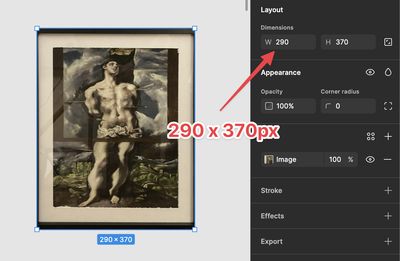
Now we can collect the measurements of all of our frames and implement them in Figma. The way we’ll do this is by giving a real life unit a Figma canvas pixel equivalent. I typically map 1cm to 10px. Centimeters are more accurate than inches, and putting a 0 on the end of every number makes everything feel quite tidy.
For each framed image, we’ll grab the width and height of the IRL frame in centimeters and set the corresponding Figma frame to that cm measurement times ten. For example, if one of my posters is 54cm x 70cm, I’ll set its proxy in Figma to 540px x 700px. It’s important to work out an easy-to-remember measurement translation system so you can easily add new walls and new frames in the future.
A quick note about Figma components
I recommend you use the Figma Create Component feature on each frame once you’ve got it warped, cropped, and resized. That way you can easily re-use it without worry of mutating the original.
Planning out walls
Now that we have all of our frames imported, we can start trying out ideas. If I’ve got a wall space I’m designing for, I typically like to measure the entire wall and create it as a rectangle in Figma, even measuring out obstacles like doors or furniture so I can get an idea of the complete visual effect. Our translation system comes in handy again here: If my wall is 13ft long and 9ft high, I can convert that easily to 394cm x 274cm, and create a corresponding Figma “wall” rectangle of 3940px x 2740px. Now my framed images will always by perfectly sized to the walls they’ll be mocking up.
Complex wall shapes
If you want your mockup to respond to wall configurations more complicated than a perfectly-rectangular wall, you can make use of the Figma boolean operations. For example, if your wall is interrupted by a door, you can measure the size of the door and its distance from the closest wall, and then create a rectangle of the corresponding size and distance on top of the wall you’ve already created. Select both the door and the wall, and go to Object → Boolean Groups → Subtract selection. Now your wall shape will be match the wall you have to work with in real life.

Conclusion and potential enhancements
And that’s my system. It’s nice to be able to try out 30 versions of one layout before committing to putting nails in the wall. I’ve been using this method for years, refining my approach each time.
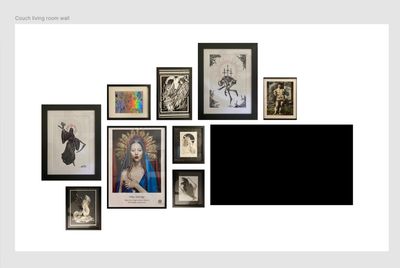
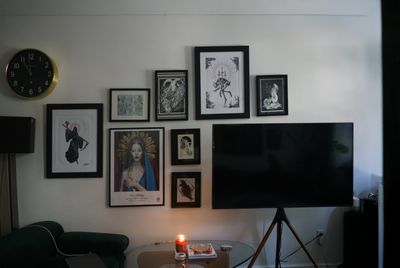
This is the most basic implementation, but there’s a ton you can do to enhance the simulation and implementation of the wall:
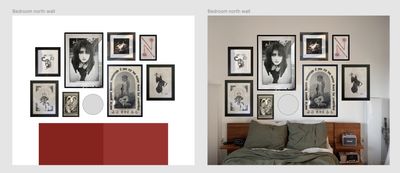
Mocking up the actual wall
I usually take a picture of the wall I’m actually mocking up and perspective warp it the same way I do everything else, and then I can add it as a fill layer to the wall rectangle I’m laying out on. It adds just that much to the simulation to have actual wall texture or overlapping furniture visible.
Documenting wall mounting points
If you wanted to get really twisted with it, you could create diagrams of where you need to create mounting holes from this. I haven’t actually done this yet, but the way I envision it would work is that you could create multi-layered components out of each frame. One layer would have the photograph of your image, and on a second layer you would create a diagram of where on the back of the frame the mounting hooks/rails/etc are.
As always, if you’ve found any issues with any of this, the blog post or the process itself, feel free to shoot me an email or get at me on Bluesky.
